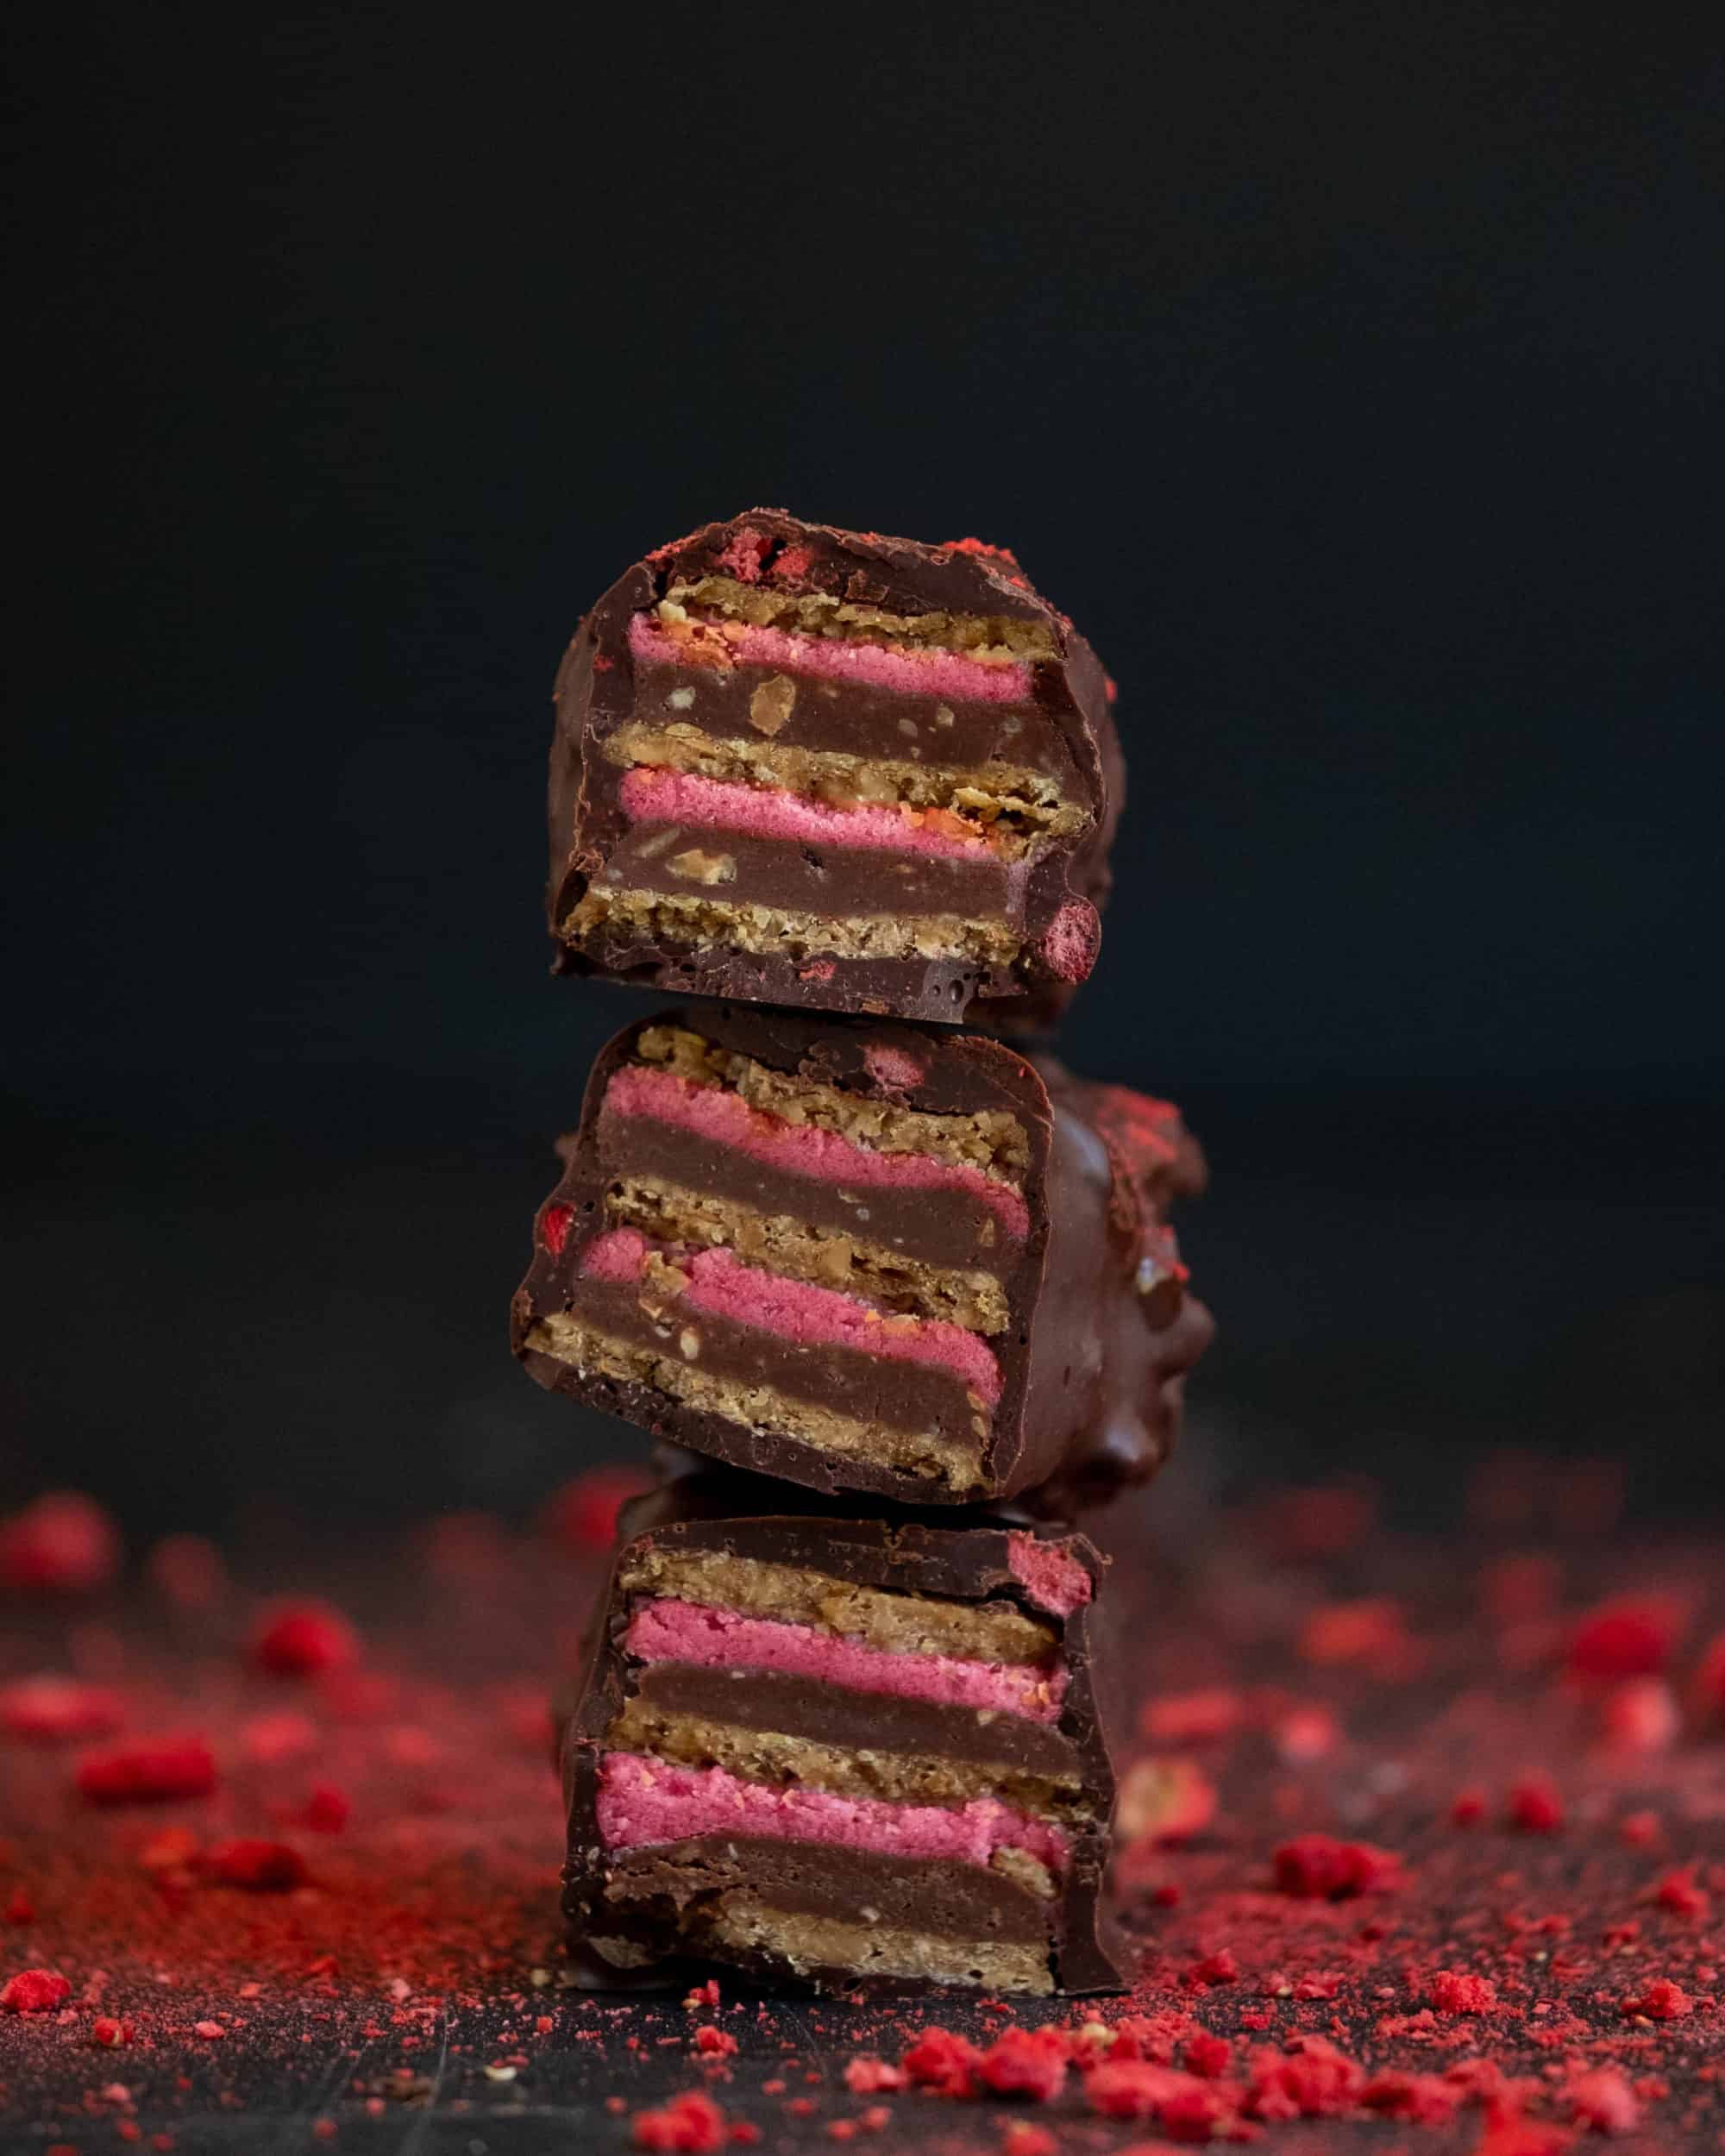
Peanut Strawberry KitKat Bars are an homage to my childhood. I loved candy bars, like Snickers and KitKat’s when I was a kid. When I got into healthier eating, those were no longer an option and, after a while, they just don’t taste good anymore. When you eat more clean, then go back to something like a Snickers Bar, you can really taste the crap in it. You know what I mean?
So, over time I have developed bars that I really enjoy and that taste way better than their artificial counterparts. The wafers in this Peanut Strawberry KitKat bar are made as thin as you can without them being see through, of course. They need to be able to hold the layers, so be sure to make them thick enough, but thin enough to be wafer-like. This can take some practice, so be patient with them and have a fun time! If you love chocolate, you might also like my Salted Peanut Caramel filled Chocolate Bars.
Peanut Strawberry KitKat
Ingredients
Peanut Wafers
- 100 g peanuts, soaked 2 - 4 hours and drained
- 100 g buckwheat, soaked 1 hour, strained and rinsed
- 1-2 tbsp water as needed to blend
- 10 g coconut flour
- 100 g coconut sugar, powdered
- Pinch sea salt
- 15 g golden flax, soaked in 60g water for 1 hour
- 20 g ground golden flax
Chocolate Peanut Praline
- 100 g peanut butter
- 80 g chocolate, melted
- 30 g maple or honey
- 30 g chopped peanuts
- Pinch sea salt flakes
Strawberry Creme
- 50 g coconut oil, melted
- 100 g xylitol, powdered
- 10 g freeze dried strawberry powder
- 6 drops vanilla medicine flower extract
- 8 drops strawberry medicine flower extract
Instructions
Peanut Wafers
- Process all ingredients in the food processor until broken down.
- Allow to sit and firm for about 5 minutes.
- Using an offset spatula, spread the mix onto teflex sheets or greaseproof paper to ¼ inch thickness and score into bar shapes as desired.
- Dehydrate at 115f or desired temp for 8 hours then flip off teflex onto mesh and dry another 8-10 hours or until crisp.
- If you want to keep the biscuits from bowing while they dry, lay a mesh sheet on top when you flip them.
- Once dry, gently break along the score lines and allow to cool before applying the next layers.
- Store in an airtight container for several months.
Chocolate Peanut Praline
- Whisk together all ingredients and put to one side. It will firm up a little as it sits, this will make it easy to spread on the biscuits.
Strawberry Creme
- Use a Vitamix or coffee grinder to powder the xylitol so it’s the consistency of icing sugar. If you are using this from storage, the xylitol can tend to clump up. In that case, run it through a sieve.
- Combine all ingredients in a medium bowl and mix using your finger tips. We don’t want too much heat in there ( from the palms of hands ).
- Pop to the side while you get the other elements together to assemble the bars.
Assembly / Finishing
- Melt and temper 200g ( 8 oz ) of your desired chocolate.
- Pair together 3 biscuits into stacks, these will create one bar each.
- Trim them carefully with a sharp knife to make uniform.
- Use an offset spatula to spread a thin layer of the praline onto 2 of the biscuits.
- Roll some of the strawberry creme into a ball in your palms, this will warm it up a little and help be the “glue” that holds the layers together.
- Press the strawberry creme on top of the praline layers.
- Stack the two completed biscuits and use the last biscuit on top top seal the deal. Gently, with equal pressure, press the blank biscuit down so that excess creme presses to the sides and can be removed. This will also fill out the biscuits so they are evenly covered.
- Complete one bar at a time until all are ready to set in the fridge.
- Set in the fridge to firm up before enrobing in chocolate.
FREE Videos: Start watching and learning today
Are you a visual learner? Yeah, me too. If I can’t be there in person, I love a video. This FREE mini series covers everything you need to know in order to start making professional quality chocolate at home with ease.
Want to know when a new recipe is posted?
You’re busy. I know this. You can’t keep checking my site for new recipes. Sign up for my newsletter and I’ll send you a new recipe every week. Boom!


